Why We Shoot in Log Format
At 100 ACRE FILMS, we pretty much shoot everything in Log format – specifically S-Log or C-Log depending on the camera. Many ask why when it creates extra work in post production. The reasons are many – we like the look, the latitude it gives us in color grading, and the ability to save a shot every once and awhile are just a few of the reasons.
On a recent shoot, the last reason really helped us save a shot from looking bad.
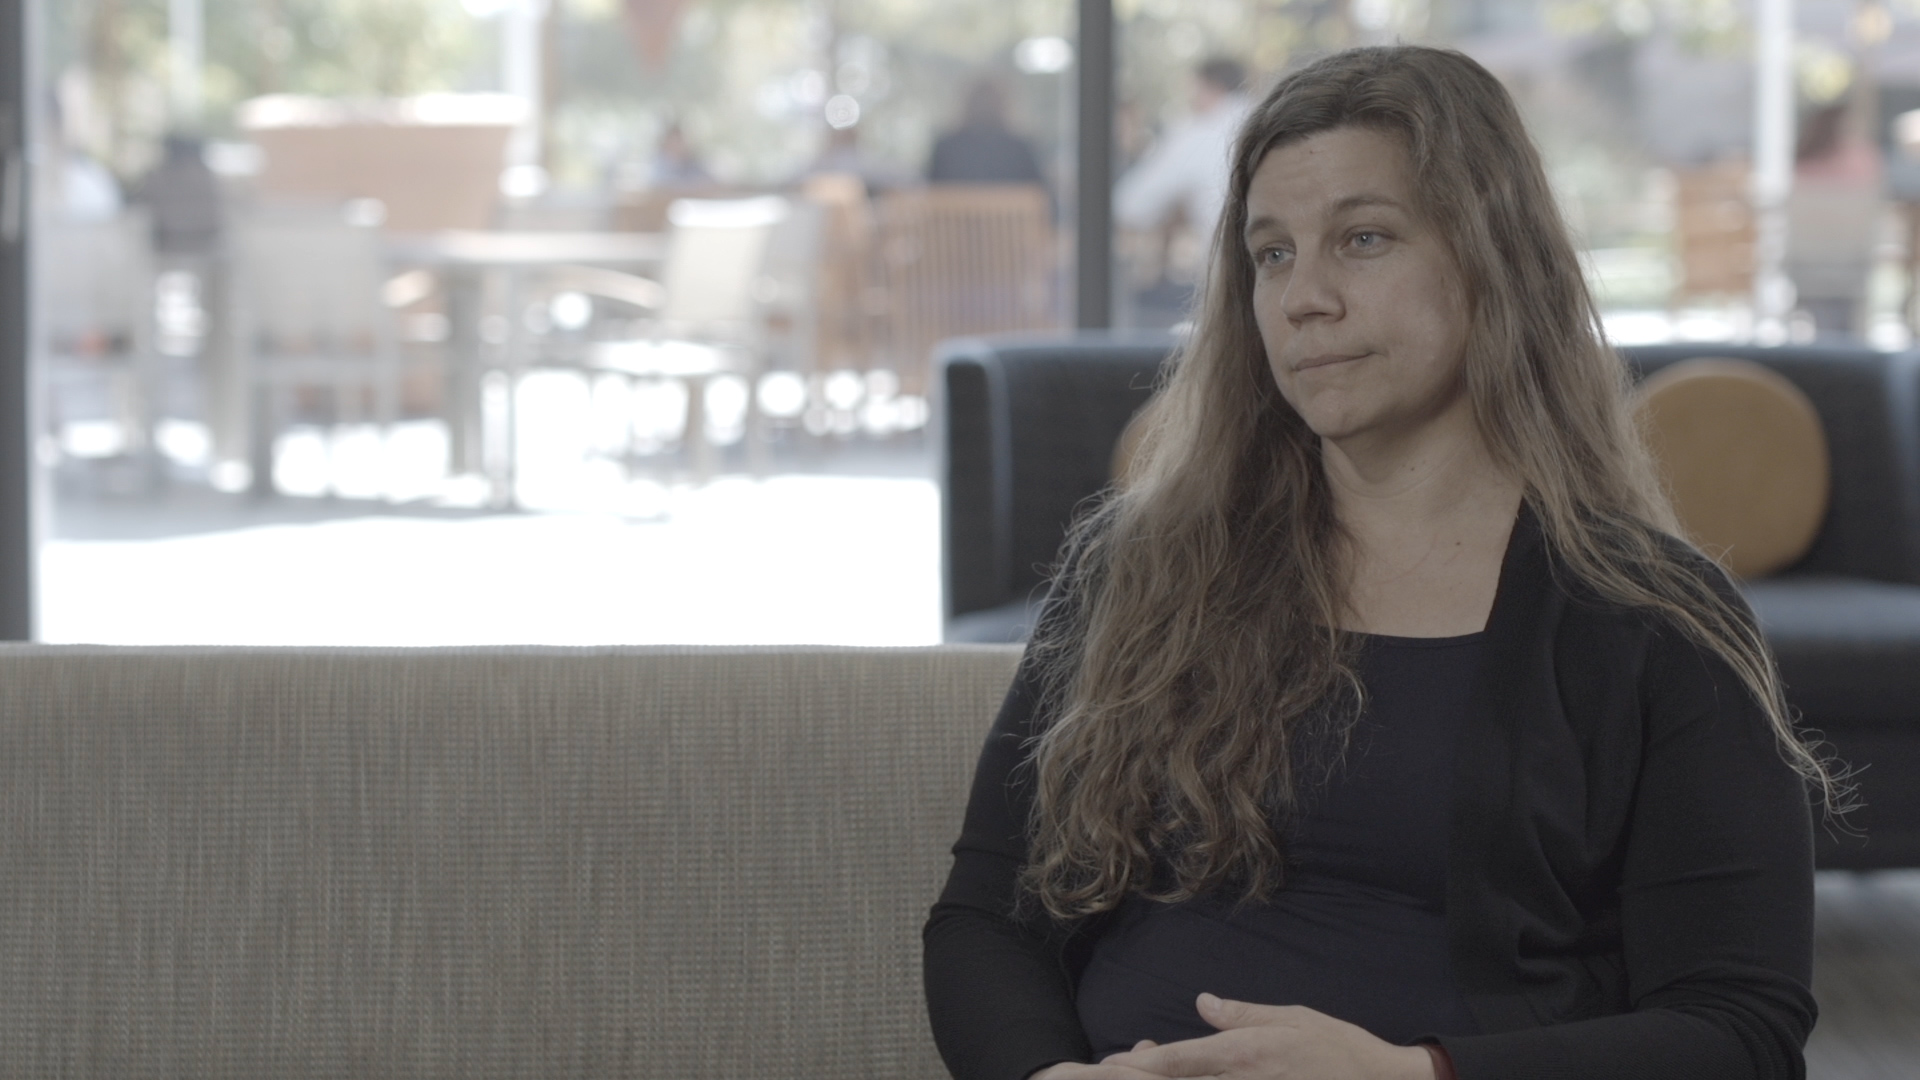
Camera Raw image from FS700
As you can see from the camera raw image (Sony FS700, UHD, ProRes, 24p, S-Log2), the background had some really bright highlights. The client wanted to shoot with the window in the background, and we didn’t have large silks to flag off the entire outdoor area, nor did we have enough ND for the large windows. But we did have our Nila Boxer light with its powerful 2K daylight balanced light, and using that to light our subject, we were able to get the exposure on her where we wanted it. We knew we would lose some of the background, but figured that if we exposed right, we could keep some of it as well.
Every shooter has his or her own rules when shooting Log, and we are no exception. We could do a whole blog post on that, but for now let’s just say an easy rule of thumb when shooting with the FS700 is to hit the histogram button twice, and that will show a yellow line for where you have your zebras set at. We have our camera set to 70%, and try to not let anything go above that. Now, obviously, going over it happens, and when it does you run the risk of not being able to get any detail back in that area. But using a waveform monitor, we felt comfortable where everything was at exposure-wise.
In getting this shot, we knew that the ground outside the window would be gone, but we did our best to keep everything above it in an acceptable range. We wanted to at least see the chairs, the plants, and the people sitting at the tables.
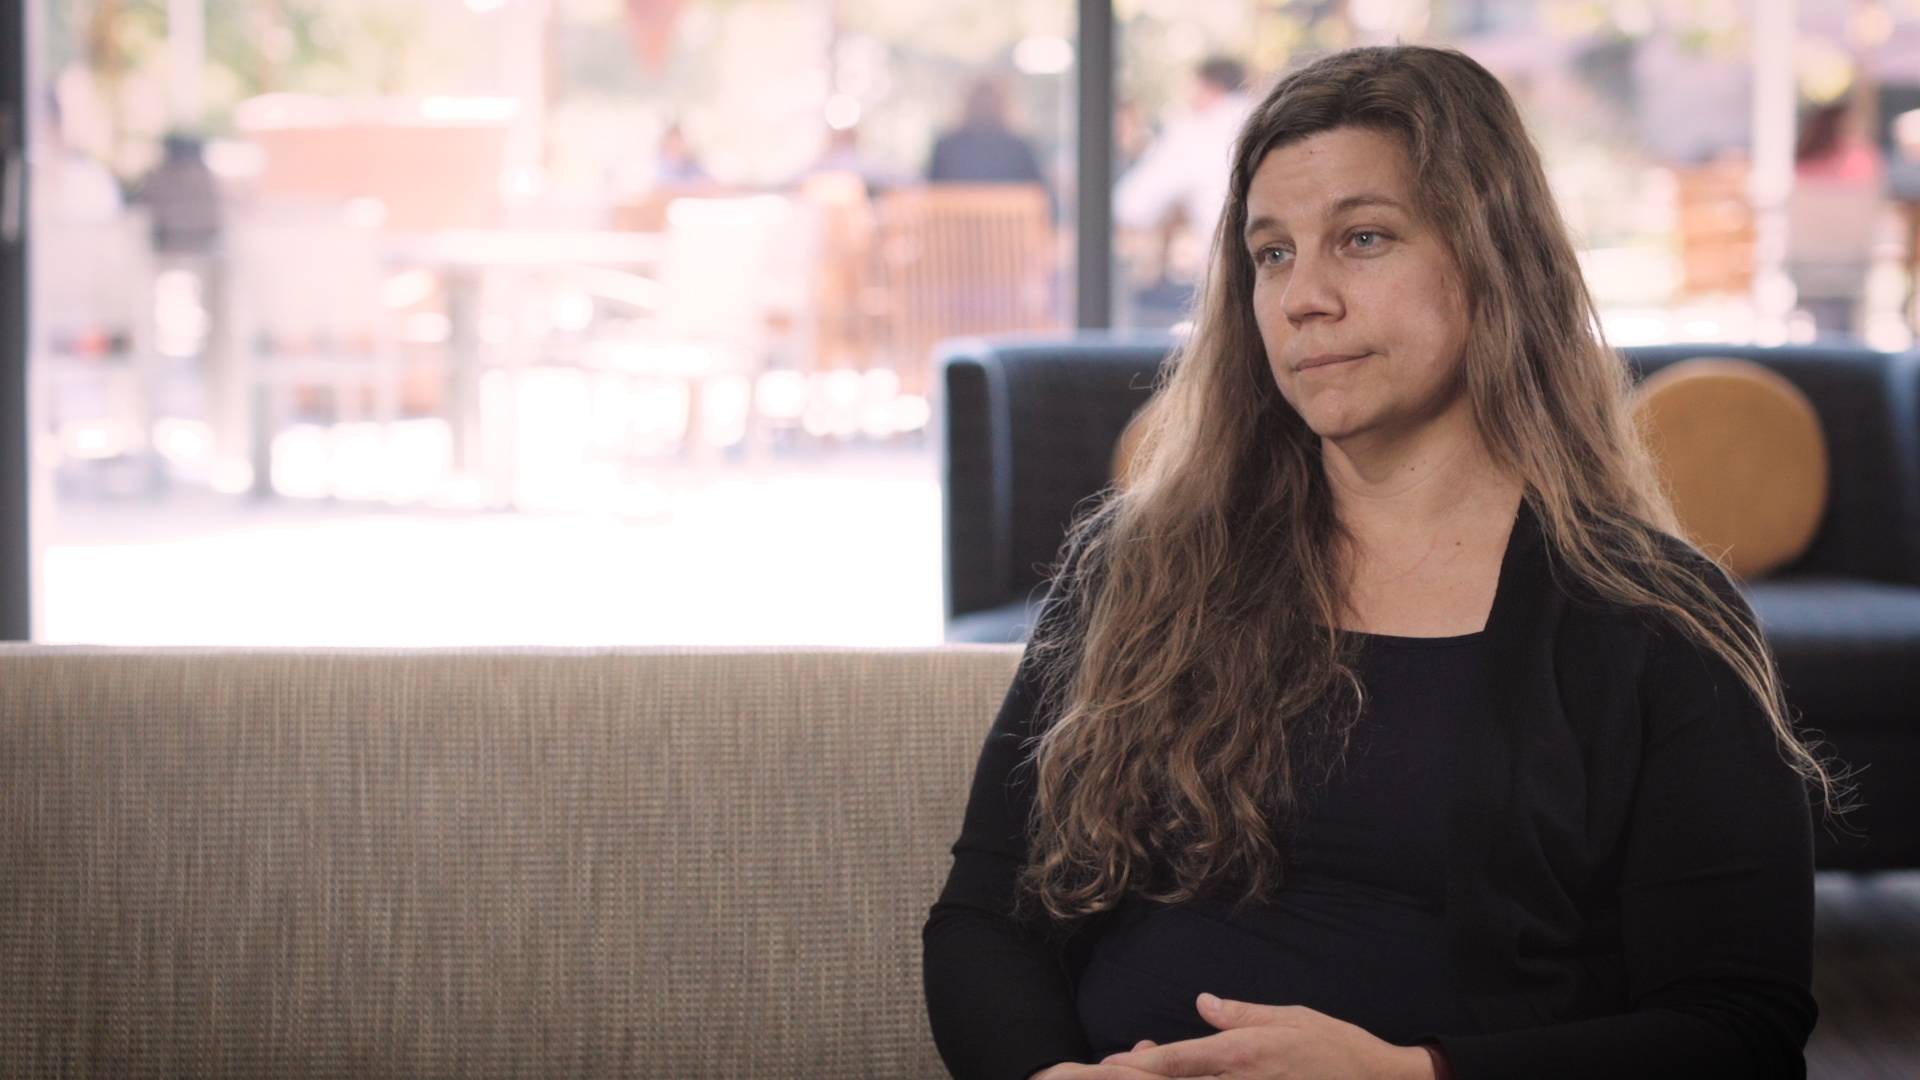
Color grade applied for foreground. The background is blown out.
Once in post, we applied a quick grade to the image, and this is what we got – the subject looked fine, but the background was awful. In Premiere Pro, we applied another layer of color correction and created a mask to separate out the background window. We put that color correction layer first in the stack of effects, and then did some simple animation on the mask since the subject moved slightly. We brought down the exposure, adjusted the contrast and highlights to better match the foreground, and that gave us something much nicer.

The finished image with more work down on the foreground and background.
So as you can see – shooting in Log can really help you save a shot in post. But trust us – it takes some practice and test shooting to get good at. If you want to switch over to Log on your camera, we highly encourage you to do some test shooting and then post-production work with the footage so you can get a handle on how it works and what its limitations are. But as you can see, once you know how to use it, it can really help you out when you have a difficult shot to expose for. We always want to be able to get the shot that our clients ask for, and knowing how best to use your tools allows you to always make that happen.
Want More Information?
Additional Posts
Contact
We’d love to hear from you! For inquiries regarding projects, employment, or just to say hi, send us a message here.